Wednesday, November 11, 2009

French Almond Cake w/berries

I've been playing with a lot with dessert-making lately. I miss the days back in California when Steve would purchase the various frozen desserts at Trader Joe's. Desserts like: Frozen profiteroles, Chocolate ganache cake, Chocolate mousse collaboration, Berry Charlotte, etc. We tried most of them.; a thin slice doled out during special moments (which was nearly every other day) and served with a lovely glass of good Port or some other dessert liquer...mmm- mmm!
Right now Steve doles out delicious bits of dark chocolate flavoured with Pear or Chili or perhaps some of his homemade biscotti (which I will feature at some point).
Problem is that his biscottis are best accompanied with tea and the chocolate bits are too small. Diet-wise this dessert regimen might be healthy but for someone used to Trader Joe's high end stuff - honey I need more!

Thus, I've tried to replicate a some less complicated styles of desserts.

I flipped through some Sunday magazine and fell upon a simple recipe for French Almond Cake with berries. The ingredients were simple - and I responded in typical Pavlovian style as my mind dreamt of chopped almonds in a butter cake - yummm!!! I had many questions though on how soft and/or rich the cake might turn out. Here is the recipe with my touch:

Serving size: 6
INGREDIENTS:
125g Caster sugar
4 eggs, separated
125g butter, softened, but not melted
250g almonds, finely ground
60g flour
500g Berries, jam or sweet greek yoghurt for serving (my touch).

PROCEDURE:
Preheat oven: 180ºC
Butter and flour a 20cm-diameter cake tin or a 22cm-diameter ring tin.
Note: I used decorative silicone plasticware - greased nicely with butter:


Using an electric mixer beat sugar & egg ytolks until pale and thick.

Beat in butter nicely then add flour & almonds:

In a separate bowl - beat egg whites until they hold soft peaks.


Gently fold in egg whites into butter/almond mixture- careful not to mix too thoroughly.
Pour in a tin and bake 30 minutes or until a skewer inserted into the middle comes out clean.

Remove from the oven, cool, flip onto a serving plate, slice and serve with berries. Alternatively if no berries, place a tsp of sweet yoghurt on top of cake slice and then 1 tsp of berry jam (or all of the above).

Notes: I tried this with an electric mixer and without (whisked by hand). I must say that one's hand gets awful sore after all that mixing. Use a mixer for best results.

I've tried this recipe with fresh ground almonds (ground with a food processor) and then another time with store-bought ground almonds. It's a matter of preference of texture of your cake. If like to feel nuts in your mouth -then grind nuts yourself in a food processor.

Easy, tasty and keeps nicely for a week. Enjoy!

Thursday, October 29, 2009

Beef dry curry (Burmese style)


Wondering about something exotic to make with all your beef?

This recipe takes about an hour to prepare and serve. It has wonderful flavour and is fairly easy for an exotic dish! It was first prepared and served to me by my partner Steve during our early years dating. (One of the many reasons I fell for him:)


I've used it for over 10 years and each time I add a little different flair to it - perhaps some Habañero chilies and/or chopped kaffir lime. These are sensible deviations and only enhance the dish over time.


Ingredients:

750g (1.5lb) stewing steak cut in 5cm (2in) squares

2 large onions

5 large cloves garlic

2 tsp chopped fresh ginger

1 tsp ground turmeric

1 tsp chilli powder (mild or xxx)

3 tablespoons mustard or olive oil

¼ tsp ground black pepper

2 tender stems lemon grass, finely sliced, or 4 strips lemon rind

Juice of 1/2 a lemon

1 cup (8 fl oz) hot water

1.5 tsp salt


Garnish:

2 large onions, finely sliced and fried until crisp & brown (OPTIONAL)

4 large stalks of fresh cut cilantro and one green onion (OPTIONAL)


Procedure:

Typically the onion, garlic and ginger are termed "basic ingredients". These are put through a food processor and puréed. The turmeric and chili are added to this purée and this whole mixture is sautéed in hot (almost smoking) oil for at least 15 minutes; the goal being to remove most of the water from the mixture without allowing it to becoming too sticky. You essentially want the oil to return.


Deviation is not a sin, I have done the puréed and non-puréed versions and I find it doesn't affect the flavour too much either way. Texture-wise there is a slight difference. Experiment for yourself. I choose the easy, non-purée, sauté of basic ingredients (minus chili):

Keep in mind though that chili, when sauteed along with the onions, garlic & ginger, will emanate it's burning sensation not only through your mucosal membranes but also to those in your immediate living space. Don't be surprised to find members of your household coughing or sneezing. Depending on what chili species you use -the experience might be damned near uncomfortable or painful. I add any chili or other pepper flakes with the meat (much more tolerable).


Going back to the sautéeing the basic ingredients...when the water has left and the oil has returned, add the meat, black pepper and lemon grass/lemon rind (and habañero). Continue frying and stirring until all the juices from the beef have completely evaporated and meat changes colour.

Note...at this point it might be your last chance to prepare your favorite version of steamed rice (in a rice cooker).


Add hot water & salt, lemon juice - cover and simmer until meat is tender (add more water if necessary).


Remove lid, raise heat and cook rapidly until the meat is oily-dry and well coated with the gravy. Taste to ensure tenderness of meat and salt levels are satisfactory.


Serve with 1.5 scoops of steamed white rice and however much dry curry you desire. Top with green onion, cilantro and fried onion topping mix (or everything minus deep fried onion as I did below):


This can be aliquotted and frozen; it only tastes better the longer it is kept:)

Wednesday, October 7, 2009

Our first farm crop!

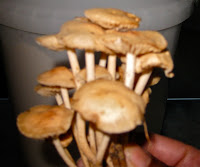
Marasmius oreades -This is the scientific name for the fairy ring mushrooms found on our farm.


There are many rings all over our property.
Fanciers of mushrooms, we were keen to find out if these were edible. When experimenting with wild mushrooms great care must be taken to really know if what you picked isn't poisonous. We researched these mushrooms to identify exactly what species they were. Yet pictures can be subjective and mistakes may still occur. If brave enough - a self experimentation must follow. After identifying the mushroom, we went ahead and picked some mushrooms from a few fairy rings - making sure gills and caps of mushrooms were of same colour and consistency.


We removed the stem of one mushroom and cleaned the gills of the cap:
There are many minute live insects lodged within the gills and I found the best way to coax them out was with running water:
Hmmm...if the bugs were found alive does that count for nonpoisonous? No. We still needed to cook one to see how we react to it.

One mushroom cap was tossed in hot oil, salted and shared between ourselves.


We waited one day to see if either of us felt queasy, out of sorts or hallucinated visions of god-like creatures. Sadly no new gods were discovered and we felt fine.

The experiment worked and fairy rings were our first home-grown crop and designated for morning breakfast. The recipe follows.

Ingredients:
2 leaves fresh sage - chopped
1 sprig thyme
1 tsp chopped fresh oregano
1 clove of diced/crushed garlic
Fairy ring mushrooms - a handful of cleaned caps; stems removed
1 Tbsp olive oil
salt to taste


Soak, wash and pat dry caps:


If caps are large slice them lengthwise:


Heat one tbsp of oil and fry garlic for 1 minute.


Then throw in diced mushroom caps and saute for 3 minutes or until water starts to come out and mushrooms appear soft:


Throw in fresh herbs and salt:


Serve as a side as I have for breakfast:
The mushrooms did not possess a strong flavour thus the garlic and herbs came through and were a lovely addition. The texture of these mushrooms were soft and smooth. So there! Free, healthy vegetables, growing wild on our farm, organic with no chemical fertilizers, low in calories and more importantly... we lived to tell about it!

Tuesday, September 29, 2009

A SPICY HOT BREAKFAST TO REV UP YOUR DAY!

When Steve and I would visit his parents in Southern California I truly enjoyed the times when his Mom would make "Thai breakfast". She learned this when she visited Thailand and makes it every so often.

I've learned this recipe from her and I put my own "holly" additions to it (as I tend to enjoy things a bit sour and xx-hot). The recipe involves rice gruel, poached egg and thai spiced chicken or pork and frankly is best prepared and eaten on a cold winter's morning.

Serving size: 2
Ingredients for rice gruel:
1 cup rice
2 cups chicken broth
2 large eggs

Ingredients for Thai spiced chicken:
1⁄4kg chicken thighs chopped
3⁄4 Tbsp Fish sauce
1 Tbsp Tom Yum
2 tsp rice vinegar
1 tsp shrimp paste
2 Kaffir Lime leaves - chopped fine
1 tsp grated ginger
1 shallot (or onion) finely chopped
2 cloves of crushed garlic
1⁄4cup chopped cilantro
1 Tbsp oil


Ingredients for spicy-sour Fish Sauce:

1⁄4 cup Thai fish sauce
1⁄2 lime squeezed for juice
2 Thai chilies (or however many you can tolerate)
Mix all of these together and set aside.

Heat chicken broth in pan and add rice (medium -low heat). Continue on a low boil until rice gets soft and soggy adding extra chicken broth if necessary.

Meanwhile -mix tom yum, shrimp paste, fish sauce and rice vinegar in a bowl and set aside.

Heat oil in pan.
Sauté garlic and ginger first until soft. Then add kaffir lime leaves.
Add chicken and onions. Stir and brown chicken on one side.


After 5 minutes, add the tom yum mixture to chicken, stir and cover; turn heat to low and let simmer for 5-10 minutes or until chicken is cooked. Turn off heat.

Return to boiling rice mixture and make sure there is extra liquid and rice is reasonably soft.
When rice is soft, create two holes in the gruel for placing the each of two cracked eggs. Cover and continue to poach to desired level.


Check on eggs in the rice gruel; when done to your liking turn off heat.
Assemble Thai breakfast as follows:

In a nice bowl place a scoop out rice and a poached egg.


Add one spoonful as desired of the Thai spiced chicken.


Sprinkle with chopped cilantro.


Add spicy fish sauce as desired.

Monday, September 28, 2009

MOHNKUCHEN...

This is just another way of saying "Eastern European poppy-seed cake"; although since it has a German name it is often referred to as German poppy seed cake. Whatever the case it hails from Europe.

Steve, my 'master-baker' has been excelling in his baking skills. He has now made this fantastic cake several times. Each time he bakes this - the house is filled with the lovely scent of citrus and poppy seed...and I just can't wait to get my slice! His recipe hails from "Morning Food - Cafe Beaujolais" by Margaret S. Fox.

Here is the recipe more (as we have performed it):
BREAD:
11⁄2 Tbsp dry yeast (check exp. date)
1⁄4 cup warm water
1⁄4 cup warm milk
1⁄2 tsp. salt
1⁄4 cup sugar
1 egg
1⁄4 cup butter at room temperature
3 cups unsifted white flour
Egg wash: 1 egg white beaten with 1 tsp water
3 Tbsp sliced almonds.

POPPY SEED FILLING:
3⁄4 cup poppy seeds
3⁄4 cup whole almonds or hazelnuts
1⁄2 cup white sugar
1⁄3 cup milk
1 tsp grated lemon peel
1 Tbsp lemon juice
3 Tbsp butter

Steve made the filling first then kept it aside - though not very long.

Procedure for poppy seed filling:

The nuts are combined in blender or food processor and blended until the mixture is consistency of cornmeal. Steve used a nut grinder or a small coffee grinder as his blenders.
In a small pan, combine the rest of the filling ingredients and cook over low heat, stirring until the mixture boils and thickens (10 minutes). Cool.

Procedure for bread:
Dissolve yeast in water with a pinch of sugar. Let it stand for 5 minutes then stir and blend in the milk, salt, sugar, egg & butter.
Gradually beat in about 2 1⁄2 cups of the flour to make a soft dough.
Flour a dough board and turn the dough out on the floured board. Adding remaining 1⁄2 cup flour as necessary, knead until it is smooth and satiny, about 5 minutes. Turn the dough over in a greased bowl, cover, and let rise in a warm place until doubled (about 1 1⁄2 hours).

When dough has risen sufficiently, punch it down. On a flat, greased surface, roll the dough out to cover the entire surface. Mark the dough lightly into 3 lengthwise sections.
In the pictures below (left to right)
  • Poppy seed filling already prepared (top left).
  • Bread machine used to knead and incubate dough as it rises (top right)
  • Steve rolling out dough for filling (bottom left & right)


Spread the poppy-seed filling over the center third of the dough as seen below.


Cut about 10 diagonal strips in each of the 2 outer sections of the dough, scoring at an angle from the outside almost as far as the filling (bottom left in the picture above).
Alternatively fold these strips over the filling, first one side then the other; as if braiding hair.


Brush the loaf with the egg wash and sprinkle surface with almonds.
Allow loaf to rise uncovered in a warm place until it has almost doubled (about 45 minutes).

Slip loaf on a baking tray and bake at 35oºF (177ºC) for 30 minutes (see below).
Cool on rack:


Guten Appetit!

Monday, August 24, 2009

To Choke or not to Choke...


Sunchokes...what are they? Jerusalem artichokes...
They are a root or Tuber vegetable native to North America (not Jerusalem). It also doesn't look anything like an artichoke. Read more about it here:


A plus for diabetics: "...unlike most starchy vegetables, the principal storage carbohydrate in sunchokes immediately after harvest is inulin rather than starch. When consumed the inulin is converted in the digestive tract to fructose rather than glucose, which can be tolerated by diabetics."

Amazing that we have never tried this vegetable. We saw a bag at our local honour box.
What is an honour box? It's a box where people sell locally picked & grown produce or "stuff". There can be anything on sale from farm fresh eggs, fruit and manure and ....sunchokes.

We got our bag of these tubers for $2.50


I looked up a few recipes on the web to check how they should be handled and the best recipe that would allow us to taste the true flavour.


I looked in the bag and OMG - these tubers were HUGELY muddy.


1st step - wash these tubers! There are options...you can skin these tubers (peel the skin) or cut them in bits and give a little scrub. We did the latter because it was easier to get the mud out:
2nd step: Heat oil in a cast iron skillet on medium-high heat. Add 1/4 tsp salt (or enough to your liking) and some fresh cracked pepper.
In this recipe - I threw in curry leaves. They add a nice smoky flavour to these chokes.
Sauté cut chokes in hot oil for about 3-5 minutes. Turn heat down and cover chokes for 15-20 minutes.


3rd step (optional): For a little extra flavour, toss in some chopped cilantro and serve:


Bon Appetít!

Saturday, June 20, 2009

Discovering Silicone...

Poached eggs are wonderful - especially when seen in eggs benedict or just on toast.
I have no utensil at home that enables me to poach eggs nicely so off to the kitchen store I went.

I found several devices but one in particular caught my eye; mainly because it was cheaper: SILICONE CUPS.

Surely these do look a little funny but I can assure you that they can not be used for personal enhancement (if you prove me wrong please email me and let me know).
Here is what they look like:


Beautiful aren't they?

I played around with this a bit - mainly with boiling times and since many have different preferences for poached eggs, I encourage people to experiment.
My preference is for the yolk to be medium soft (still a bit runny).
The directions accompanying the silicone cups state to lightly grease the cups, boil water first, then set the cups in water and cover from 4-6 minutes.

Since I like my eggs medium soft and I was using smallish sized eggs, I experimented and found this to work for me:
- Boil water
- Oil or spice up silicone cups.
- Crack egg inside.
- Float silicone cups in boiling water and cover for 3.5 minutes.
- Turn off the burner and keep covered for about 30-45 seconds more.

Silicone retains a bit of heat so taking them out of the water and laying them on a heat resistant counter will continue to slowly "cook" the proteins (FYI).

Again - experiment because there are some variables:
  • Burner temperature (low, med. high)
  • Size of egg
  • Your preference in poaching.

After they are poached to your liking, use a spoon and run along the edge and flip it onto a serving plate. Voila!

Here is a small toy slideshow video of these silicone cups used in different formats; it will take a little while to download when you hit play; if you are seeing this at work don't be surprised if your company's "IT-Nanny" forbids you to peek into Youtube. Enjoy: